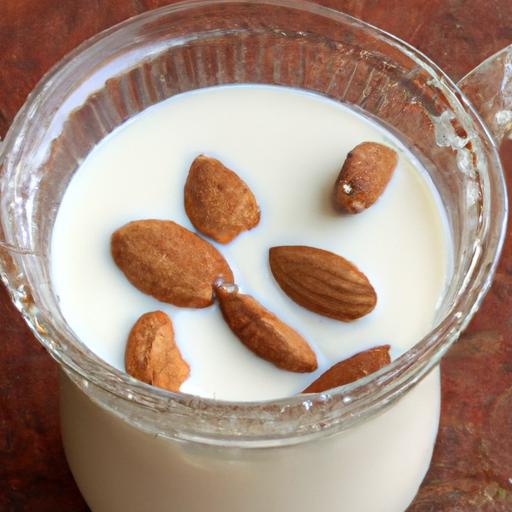
There’s something deeply satisfying about creating your own almond milk from scratch-a luscious, creamy elixir that transforms everyday nuts into a nourishing, velvety drink. Whether you’re seeking a dairy-free alternative, craving a fresher taste, or simply drawn to the charm of homemade goodness, crafting almond milk at home is surprisingly simple and wildly rewarding. In this guide, we’ll journey through the easy steps to make your own silky almond milk, unlocking tips and tricks for that perfect balance of flavor and creaminess-all without a single additive or preservative in sight. Get ready to elevate your kitchen ritual and embrace the wholesome delight of homemade almond milk!
Choosing the Perfect Almonds for Rich Creaminess
Crafting creamy almond milk starts wiht selecting the right almonds, a simple step that profoundly elevates flavor and texture. For the richest, smoothest homemade almond milk, opt for raw, organic, and preferably blanched almonds. Blanched almonds lack skins, which contributes to a cleaner, creamier result without the slight bitterness sometimes present in skin-on nuts. when choosing your almonds, look for plump, uniform nuts free of wrinkles or discoloration to ensure freshness.
While raw almonds provide an ideal base, you can experiment with almonds from trusted growers known for superior quality, ensuring the creamiest result with a naturally sweet undertone. Avoid roasted or salted almonds at this point, as additional processing affects the milk’s purity and texture.
Soaking Secrets to Unlock Ultimate Smoothness
Soaking almonds overnight (or for at least 8 hours) is the magical step that plumps the nuts,softens their texture,and unlocks a velvety creaminess that is essential for a luscious almond milk. This process not only activates enzymes that aid digestibility but also helps release natural oils and flavors, making the milk smoother and more luxurious.
For best results, soak your almonds in filtered water with a pinch of sea salt or a splash of fresh lemon juice to gently enhance brightness and cut any faint rawness. After soaking, drain and rinse the almonds thoroughly before blending-this ensures a crisp, clean taste.
Step by Step almond Milk Blending Techniques
Once your almonds are perfectly soaked, it’s time to harness your blender’s full potential. Crafting creamy almond milk requires a careful balance of blending time and water ratio.to start, combine 1 cup soaked almonds with 4 cups fresh, cold filtered water-adjust water depending on your desired thickness.
- Pulse the almonds briefly to break them up slightly, about 10 seconds.
- Blend continuously on high speed for 2 minutes.This prolonged blending helps extract maximum creaminess, breaking down the almonds into a silky emulsion.
- Stop and scrape down the sides of your blender jar to reincorporate any nuts stuck to the edges.
- Blend again for another 30 seconds to ensure even consistency.
- Strain the mixture through a fine nut milk bag or cheesecloth into a large bowl, gently squeezing to extract every drop of liquid.
- if desired,repeat the straining for a smoother result,especially if you prefer the milk ultra-fine.
- Transfer your almond milk to a clean glass jar and chill for at least 1 hour to let flavors meld.
Visual cues during blending are important: the milk should appear creamy but not gritty, with a naturally off-white colour. Avoid over-blending as it can cause separation or grittiness.
Enhancing Flavor Naturally with Simple Additions
Elevate your homemade almond milk using simple, natural flavor enhancers that harmonize without overwhelming the nutty base. Add a splash of pure vanilla extract or a teaspoon of maple syrup for gentle sweetness.A pinch of sea salt balances the flavors and brightens the almond’s natural richness.
for a seasonal twist, consider incorporating ground cinnamon or a dash of cardamom for warm, inviting notes. If you prefer a creamier mouthfeel, blend in a small chunk of fresh ripe banana or a tablespoon of coconut cream.
These additions enhance but never mask the creamy texture that makes homemade almond milk so special-perfect for sipping straight, using in coffee, or enriching your morning smoothie.
Prep and Cook Time
- Prep Time: 10 minutes (plus 8 hours soaking)
- Blend Time: 3 minutes
- Total Time: Approximately 8 hours 15 minutes (mostly inactive)
Yield
Approximately 4 cups (1 liter) of creamy almond milk
Difficulty Level
Easy – Perfect for both beginners and seasoned home cooks
Ingredients
- 1 cup raw, organic blanched almonds
- 4 cups cold filtered water
- Pinch of sea salt (optional, for soaking)
- 1 tsp pure vanilla extract (optional)
- 1 tsp maple syrup or honey (optional)
- Ground cinnamon or cardamom, for sprinkling (optional)
- Additional flavor boosters: 1 tbsp coconut cream or ½ ripe banana (optional)
Instructions
- Place the almonds in a bowl and cover with filtered water and a pinch of sea salt. Soak for at least 8 hours or overnight until swollen and soft.
- Drain and rinse the soaked almonds thoroughly to remove any residual bitterness.
- Add the soaked almonds and 4 cups cold filtered water to your blender.
- Pulse briefly to break up the almonds, then blend on high speed for 2 minutes until smooth and creamy.
- Pause to scrape down the sides of the blender jar and blend again for another 30 seconds.
- Strain the mixture through a nut milk bag or fine cheesecloth into a bowl, squeezing gently to extract all liquid.
- Transfer your almond milk to a clean jar. Stir in vanilla extract and maple syrup, if using, and chill for at least 1 hour before serving.
- Shake well before each use as natural separation may occur.
Chef’s Notes & Tips for Success
- For a thinner milk, add more water; for a richer creaminess, reduce water slightly and/or add coconut cream.
- Use a high-powered blender to ensure a smooth texture and avoid graininess.
- Don’t discard the leftover almond pulp-dry it in the oven and use as almond flour in recipes.
- homemade almond milk keeps fresh up to 4 days refrigerated.Always shake before pouring.
- Try soaking almonds with a small piece of kombu seaweed to further enhance creaminess and add minerals.
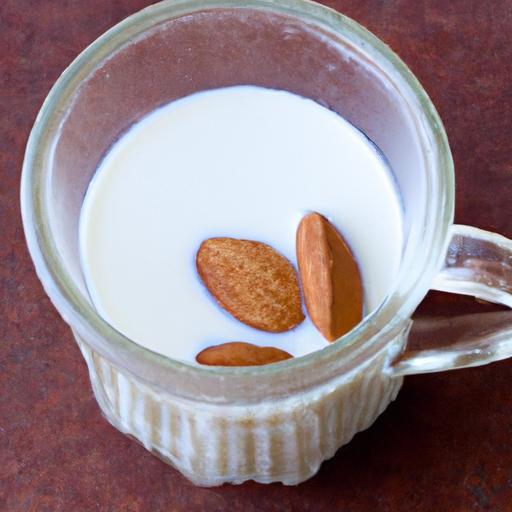
Serving Suggestions
Serve chilled almond milk over ice with a sprinkle of cinnamon for a refreshing drink. Use it as a creamy base in lattes or smoothies, or pour it over warm oatmeal for a comforting breakfast. garnish with freshly grated nutmeg or a few crushed roasted almonds for added texture and aroma.
| Nutritional Info (per cup) | Calories | Protein | Carbs | Fat |
|---|---|---|---|---|
| Homemade Almond Milk | 60 kcal | 2 g | 2 g | 5 g |

For even more plant-based milk inspiration, check out our simple homemade oat milk guide and discover new ways to enrich your daily routine.

Q&A
Q&A: Crafting Creamy Almond Milk – A Simple homemade guide
Q1: Why make almond milk at home instead of buying it?
A1: Homemade almond milk lets you control every ingredient-no hidden sugars, preservatives, or additives. Plus, it’s fresher, creamier, and tailor-made to your taste and texture preferences. It’s a satisfying ritual that transforms humble almonds into a silky, nutrient-packed beverage.
Q2: What’s the secret to creamy, smooth almond milk?
A2: Soaking your almonds overnight softens them, unlocking their full creaminess. When blended with fresh water at the right ratio, and then carefully strained through a fine nut milk bag or cheesecloth, you get that luscious texture without grit. For extra richness, try adding a touch of vanilla or a pinch of salt.
Q3: How long does homemade almond milk last?
A3: Fresh almond milk keeps well for about 3 to 5 days when stored in an airtight container in the fridge. Always give it a good shake before pouring, as natural separation happens-no stirring needed to keep that velvety smoothness.
Q4: Can I use the leftover almond pulp?
A4: Absolutely! Don’t toss that goldmine of fiber and nutrients. Almond pulp shines in smoothies, baked goods, granola bars, or even as a base for almond flour. It’s the bonus harvest of your creamy creation.
Q5: Is almond milk a good dairy alternative for everyone?
A5: Almond milk is a fantastic plant-based option for those avoiding dairy or seeking lower calories. Though, if you have nut allergies, it’s best to steer clear. Nutritionally, homemade almond milk tends to have fewer additives but also less protein than cow’s milk, so consider your dietary needs accordingly.
Q6: Any tips for flavoring my almond milk?
A6: Let your imagination run wild! Add dates or maple syrup for natural sweetness, cinnamon or cardamom for warmth, or a splash of cocoa for chocolate lovers. A little vanilla extract can also elevate your milk to a café-worthy treat.
Q7: What equipment do I need to start making almond milk?
A7: Simply a blender,a bowl to soak the almonds,and a fine nut milk bag or cheesecloth to strain. That’s it! No fancy gadgets-just your hands, some patience, and a handful of almonds.
Crafting your own almond milk is like coaxing nature’s creaminess from a simple nut-pure, pleasurable, and perfectly personalized. Ready to blend?
To Conclude
With just a handful of almonds and a little patience, crafting your own creamy almond milk transforms from a curious experiment into a deliciously rewarding daily ritual. Beyond its smooth texture and subtle nuttiness, homemade almond milk offers the freedom to customize every batch to your taste and dietary needs-free from additives and brimming with natural goodness. So next time you reach for that carton on the store shelf, remember: the richest, creamiest almond milk might just be waiting to flow from your own kitchen. Embrace the simplicity, savor the freshness, and let your almond milk journey begin.